Monday, September 26, 2011

International Cooking Class

I just wanted to share some pictures from an enjoyable international cooking class that I attended a couple of Saturdays ago. The demonstration focused primarily upon Armenian foods...my first taste of such, and so very delicious!


Marina (in the red apron) was our hostess for the day, as well as our teacher.  This picture shows the filling for the main dish of Armenian Tolma (stuffed grape leaves).  We also stuffed cabbage leaves and vegetables to create Armenian Summer Tolma.


Some of the wonderful, fresh, summer vegetables in Tajikistan.


Marina's nimble fingers rolling the blanched grape
leaves freshly picked from her yard.


We all had a hand in rolling the leaves...
it was similar to rolling a tiny burrito.


The pot of Tolma before cooking.


Stuffing the fresh eggplant, peppers, tomatoes with the same stuffing: ground beef (hand ground), rice and spices.


Summer Tolma, ready to enter the pot to be cooked.


Final product of stuffed grape leaves, cabbage leaves, and eggplant. My mouth just waters looking at this photo,
remembering the flavor!


Marina also demonstrated some appetizers:

Cottage Cheese Balls "Ala Marina," her own recipe,
also stuffed into peppers...


A larger, party size cottage cheese ball,
with a lovely carrot crudite garnish...


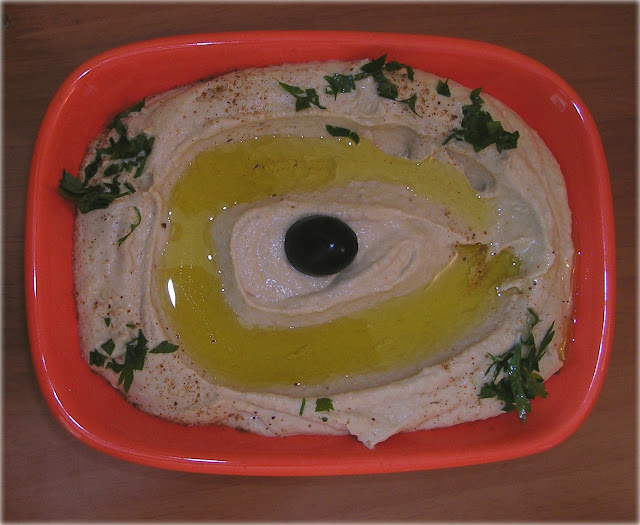
and hummus, my favorite, made right from scratch
from dried chickpeas, served with pita bread or Armenian Lavash.


After all of the cooking, we were delighted to eat it!

We also were served a yummy American Oatmeal Sheet Cake, which of course we ate before any of the cooking began. 


Thanks so much to Marina for opening her home and teaching us these delicious dishes. Her attention to detail in the dish presentation was so very inspiring as well. I do plan to attempt all of the new recipes presented.

It was a wonderful time of new friends,
flavors (especially on my part!), 
and life as an expat in Dushanbe!


Saturday, September 24, 2011

Ribbon Inspiration/Stamp Simply Style--Lace


Lace is the subject of today's Ribbon Inspiration/Stamp Simply Style post! Lace can be so versatile...borders, bows, even blossoms...plus it can add a much needed texture to papercraft design.

My design for today primarily uses Melissa Frances products. Take a look, and I'll tell you all about it...

I wanted to create a tag with vintage appeal...Melissa Frances "Vintage Attic Treasures" decorator paper was just what I had in mind, and was used for the base and layers of the design. 

The fleur de lis stamped on the right side of the tag is from JustRite's new "Bon Voyage" set.  I stamped off once, using Versafine Sepia Ink, before stamping onto the tag. I was hoping to achieve a faded look, and was happy with the results.

Did you notice the Melissa Frances "Neutral Vintage Crepe Paper" peeking out from behind the Prima "Oatmeal Millinery Collection" blossom? I made it by pleating the crepe paper into a fan, threaded a needle and twine through the base, then tied the twine tight after connecting the ends, fashioning the blossom. It looked like an accordian blossom at this point, so I simply flattened it out in my palm. Antique linen distressing ink on the edges adds a bit of interest and highlights the folds of the crepe paper.


May Art's 1/4" Ivory Silk Ribbon, touched up with some of the antique ink, makes a base for a Melissa Frances vintage "Small Lockbox" key embellishment. The resin key comes in a white color, so I dabbed a bit of linen paint on it to tone it down to match the rest of the design.

The "inspirational" portion for today is the Melissa Frances cream colored "Lace Trim." You can purchase it in either cream or white colorway.


More of the May Art's Ivory Silk, as well as May Art's natural "Burlap String," tie off the top of the tag. This was a fun project, and came together fairly quickly.

All of the supplies used today are available at The Stamp Simply Ribbon Store.

If you're looking for lacey love, be certain to check out the rest of the blog lineup:

Sharon Johnson - The Stamp Simply Ribbon Store

Holly McMillen
Barb Schram
Michelle Woerner
Deb Saaranen (you're here!)
Tammy Hershberger

Once again we have Mystery Blog Candy (see first photo of post), meaning the winner will be drawn from comments on one of today’s participating blogs, so leaving a comment on each blog will greatly increase your chances of winning, but only one comment per blog, please. The winner will be selected at 6 p.m. Eastern time on Tuesday, September 27 and will be posted on Sharon’s blog on Tuesday night or Wednesday, so please check back to claim your prize if you are the lucky winner!

Thanks so much for joining us this week. Please be sure to check back next Saturday, when we will be featuring another type of ribbon inspiration!


Thursday, September 22, 2011

File Folder Melissa Frances Recipe Keeper

If you're anything like me you have recipes...gleaned from your friends, copied from the magazine at the doctor's office (you get the idea) scratched onto backs of envelopes littering the depths of your purse. Half the time I go to look for that yummy dessert recipe, it's gone!

Well, I've designed a little go-between for those recipe scraps...a place to stash them until you properly copy them onto recipe cards or enter them into your computer. My sample shows actual recipes written on index cards or printed from the internet...I couldn't find any of the ones currently trashing my bag...they're gone...? LOL!


This project makes use of four office file folders, and the oh-so-fun Melissa Frances 12 X 12" decorator paper, "Kitschy Kitchen."

The album measures 9" X 9.75." To make it easy, I just cut two inches off of the bottoms of the file folders. I fashioned the booklet by layering three folders into each other--just like a book--adhering the "page" backs with double sided, strong tape. All of the pockets and envelope in the design are layered upon file folder stock as well, with the intent to provide extra strength.


I decorated the front with paper pieced borders and heart, all papers from the "Kitschy Kitchen" pad. The heart base was die cut with a Spellbinders Classic Heart die. Chipboard letters from my stash received a dressing of DP and distressing before being adhered.


The first two pages feature slide in pockets for index cards or scraps of paper. The tag reading "quality ingredients" is also by Melissa Frances, "Kitschy Kitchen Tag Collection."


Here's a closeup of the delightful image on the tag...I stamped the "healthy" on for good measure.


 Here are the next pages. There is a flapped envelope fashioned onto the left page. The right side has a full length pocket to slide in bigger sized pieces of paper.


The closure is simply two brads, circles cut by a Spellbinder Classic Circle die, and string.


A CHEERY cherry red button tab accent.


Tabs running up the sides also up the "cute" factor...

I intentionally kept the embellishments fairly flat and to a minimum. I intend to store this sidled up to my cookbooks on the shelf.

Another idea: this would make a lovely shower gift for the new daughter-in-law or daughter filled with family favorites. The Melissa Frances "Kitschy Kitchen" decorator paper and tag collection are both from The Stamp Simply Ribbon Store.

If you don't feel up to creating an entire album from scratch, there are also Melissa Frances Recipe Kits for sale at Stamp Simply as well.

Thanks for stopping by today. Remember to check to see if you were the winner from last Saturday's Ribbon Inspiration/Stamp Simply Style hop over at Sharon's blogThe winner was chosen from comments on my post...so, just tellin ya!

Be sure to check back here this upcoming Saturday for a new Ribbon Inspiration/Stamp Simply Style lineup!

Hope to see you then!

Tuesday, September 20, 2011

Quick Card Using Die Cuts


I just wanted to pop in to show you a quick and easy all occasion card using die cuts...no stamping necessary...with a couple of additional products thrown in.

This lovely floral die cut is from K and Company..."Spring Blossom Seed Packet." The images are designed by Susan Winget, and are simply beautiful. You get 44 pieces per packet with a variety of sizes. Perfect for adding a pretty touch to a quick design. 

NOTE: You can barely see the entire sentiment as it is photographed. It reads "All things grow with love." So sorry!

I've chosen decorator paper from K and Company's "Botanical Specialty" 12 X 12" pad for the printed panels. "Botanical Specialty" is also designed by Susan Winget, and includes lovely garden prints, with some that are glittered and foiled.

The May Art's Gingham bow is tied with a "Bow Easy," and the panels are popped up with dimensional tape. Did you know that there is a larger "Bow Easy" available for larger bow making? It's perfect for wreaths, swags, holiday decorations, and gift packaging!

All of these supplies can be purchased from The Stamp Simply Ribbon Store.


Here's a last closeup as I say goodbye for today--have a wonderful remainder to your week!

ETA: News flash...Sharon has just listed all in stock K and Company product on a special sale...be sure to check it out!


Saturday, September 17, 2011

Ribbon Inspiration/Stamp Simply Style--Metallic

It's time once again for Ribbon Inspiration/Stamp Simply Style Saturday! This week, we're focusing on metallics: ribbon from the Metallic or Wired sections of The Stamp Simply store, reflective or shiny accented decorator papers, or embellishments.


There is "Mystery Blog Candy" once again,  pictured to the left. One fortunate person will walk away with these metallic goodies...if you would like a chance to win, you must leave a comment on each of the participating designer's blogs. One comment per person, please! 


My choice of metallic for today is

KaiserCraft paper usually has some wonderful textural elements included in their decorator pads. There are often foiled, metallic accents, as well as flocked sheets, as part of the pad. This is certainly a case of "Lullaby Collection."  This pad is 6.5 X 6.5" and includes both a pink and blue colorway.

Since I wanted to make my card long and narrow, I had to paper piece the background sheet. You can typically hide the seam in patterned papers doing so. An accent away from the seam (in this case my bow to the very right), or covering the actual seam, will help if it appears to be outstanding.


Aren't these tiny, foiled sentiment panels sweet?
There are two pages for each boy and girl
sentiments included in the pad,
as well as precut labels, tags and
borders to mix and match the printed papers.


A border of scalloped white cardstock, May Art's Wrinkled Ribbon, and a Webster's Pages "Sparklers" gem, add the final touches to this simple, yet pretty in pink, design.

Designers for today:

Barb Schram
Deb Saaranen (you're here!)


Reminder for the blog candy: the winner will be selected at 6 p.m. Eastern time on Tuesday, September 20 and will be posted on Sharon’s blog on Tuesday night or Wednesday morning, so please check back there to claim your prize if you are the lucky winner! Best wishes!


Thanks so much for stopping by!


Wednesday, September 14, 2011

Pictures of Dushanbe

Hello! I've promised some pictures of our new country, and will continue to share them from time to time. I'll keep the descriptions brief, hopefully you will enjoy seeing what we see in our day to day lives.

Our home and courtyard. We have persimmon trees, cherry trees,
and grapevines growing here.


The wall surrounding our courtyard. Most homes are surrounded by walls...good for security, but difficult to meet neighbors who maybe enjoying the out of doors.


Some of our persimmons ripening. I have to google to see what to do with them. They ripen fully in the Fall months.


Not our grapevines...our grapes were picked before we arrived. These are just hanging over the sidewalk right down the
street from us. Paul has made some grape juice from
the grapes from our local market.


One sidestreet not far from us. Apartments above storefronts, one displaying the Tajikistan flag. The sidewalks are wide, and
most streets are lined with mature trees.


The Dushanbe Opera and Ballet Theatre. We attended a performance featuring a trio of Russian Folk singers. 
 It was very enjoyable!


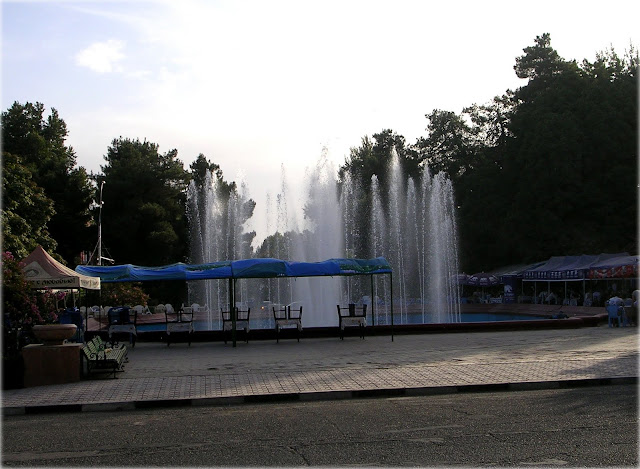
Outdoor fountains and restaurants across from Opera house.


The Opera House stage and curtain.


The gorgeous ceiling and chandelier in the Opera House.


Beautiful upper tier of seating at the Opera House.


Intricately carved gate at our neighbor's house.

Well, I'll close for now. I'll be back next time with pictures of the open market, shops, and people around town!

Hope you've enjoyed getting a peek at what we're experiencing! Thanks for stopping by!


Tuesday, September 13, 2011

LaBlanche

Hello! I've been playing with a new LaBlanche stamp, "Big Straw Hat," that I received from The Stamp Simply Ribbon Store.


I was drawn to this little garden gal, and thought that she would be perfectly dressed in a paper pieced coat.  If you haven't tried paper piecing on your stamped images, now is the time to try--it's an easy way to marry image with background.


To begin, I stamped my image with Memento Tuxedo Black ink (my fave for Copic coloring--you can get it from the Stamp Simply site) onto a crisp, white cardstock, then proceeded to color it with Copic Sketch markers. I then stamped the image onto decorator paper (K and Company "McKenna") from my stash, making certain that the coat portion of the girl's outfit was clear and present. I carefully cut just the coat out, checked the fit to the image panel, then glued it into place with a glue pen.  After the glue dried, I took a Copic marker and shadowed areas of the coat...like I said, EASY!

The layer beneath the image panel is Spellbinder's "Scalloped Edge Frame Framabilities" (check with Sharon for availability).

A greeting from JustRite's new "Just Because Mini Sentiments" seem to speak all that is on this little gal's mind, secured with some May Art's "Wrinkled Ribbon" and a button.

I hope that you get a chance to do some paper piecing this week! Thanks so much for stopping by! Remember to check back on Saturdays for "Ribbon Inspiration/Stamp Simply Style!"

Saturday, September 10, 2011

Ribbon Inspiration/Stamp Simply Style--Suede

We're continuing with our ongoing Saturday feature: 
this week featuring SUEDE May Art's Ribbon!


I'm playing along, even though, yes, you've guessed it...suede is still travelling with the rest of my supplies. Someday I will gladly announce the big arrival...LOL...until then I will continue to play along, making substitutions where possible. Thanks so much for your patience!


My design for today is purposefully very neutral. I was aiming for just a hint of color on my Copic colored LaBlanche "Peony" stamped image. I can also picture this image colored in a vibrant fushia color...just like the peonies that bloom in my MIL's yard.

The base of the card is covered with a french text print from 7 Gypsies "Conservatory" paper pad.

The middle layer of designer paper is from Prima's "Botanical" 6 x 6" pad. I just love the muted fleur de lis print with the pale gray ferns and foliage running along the edge. This print inspired the entire card coloration...soft and muted.

My "suede" for today is actually a border of 1/8" narrow black velvet, layered over black May Art's Wrinkled Ribbon. A little "Vintage Trinkets-Lock and Key" charm adds the final touch.

All supplies today, minus the Copic Sketch Markers, are from The Stamp Simply Ribbon Store.

This is a Mystery Blog Candy, meaning the winner will be drawn from comments on one of today’s participating blogs, so leaving a comment on each blog will greatly increase your chances of winning, but only one comment per blog, please. The winner will be selected at 6 p.m. Eastern time on Tuesday, September 13 and will be posted on Sharon's blog on Tuesday night or Wednesday morning, so please check back to claim your prize!


Our line up for today's inspiration:

Sharon Johnson - Stamp Simply Ribbon Store

Deb Saaranen (you're here...keep on going!)
Michelle Woerner
Holly McMillen
Barb Schram
Tammy Hershberger - Our Guest this Week!

Thanks so much for stopping by! Best wishes for the blog candy, a collection of sueded ribbon, pictured above! Please be sure to check back again next Saturday for our next installation of Ribbon Inspiration/Stamp Simply Style!


Monday, September 5, 2011

Ribbon Inspiration/Stamp Simply Style--Rosettes

Something new at The Stamp Simply Ribbon Store:

"We at The Stamp Simply Ribbon Store are starting a new and regular Saturday post, with a big kick-off today! We ALL love our ribbon and how versatile it is, so we thought it would be fun to share some ribbon inspiration with you all each Saturday -- thus our title -- Ribbon Inspiration/Stamp Simply Style. Each Saturday we'll feature one type of ribbon and show you various ways that we like to use it. You'll see designs from the regular Stamp Simply Designers as well as a few guests popping in and out here and there."


This week we are showcasing Rosettes.


There are many types of premade flowers sold by the yard that offer a variety of opportunities for scrapping, card-making, sewing and crafting in general. So be prepared for some wonderful Rosette inspiration today!

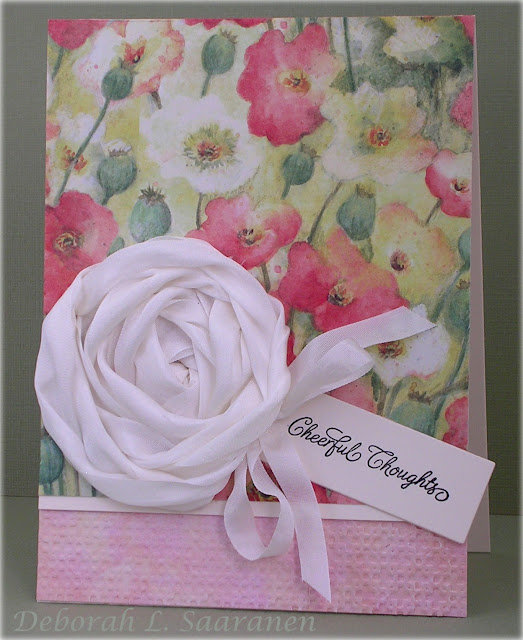
I wanted to play along, but most of my ribbon stash is still on a slow boat to Dushanbe...so, I'm going to cheat a bit! I'm making my own rosette, thanks to one of Cosmo Cricket's "Glubers" and some lovely ivory colored May Art's Silk Ribbon, both available from the Stamp Simply Ribbon Store.


It was quite fun fashioning the ribbon rosette. A May Art's 1/4" silk ribbon bow adds an extra touch to the rosette and tag, stamped with a sentiment from JustRite's new "Just Because" Mini Sentiment Set and  dies from JustRite's "Happy Everything Tag Making Kit."

The paper used here is from K and Company's "Spring Blossom Mat Pad."

Fun!  All supplies used today are from The Stamp Simply Ribbon Store.

And...

This is a Mystery Blog Candy hop (see the rosette photo above), meaning the winner will be drawn from comments on one of today’s participating blogs, so leaving a comment on each blog will greatly increase your chances of winning, but only one comment per blog, please. The winner will be selected at 6 p.m. Eastern time on Thursday, September 8, and will be posted on Sharon's blog on Thursday night or Friday, so please check back to claim your prize if you are the lucky winner!

Barb Schram
Linda Duke
Holly McMillen
Deb Saaranen (this is the end of the line...thanks so much for stopping by!)

I hope that you've enjoyed a bit of inspiration today...pull out your bits and pieces of ribbon and get creating!